This tutorial will make a 6" Friendship Star Block. I used only two fabrics. A cream tone on tone fabric for the background and a pattern blue fabric for the star block.
Background
Cut two 3 1/2 inch squares
Cut four 2 1/2 inch squares
Star
Cut two 3 1/2 inch squares
Cut one 2 1/2 inch square
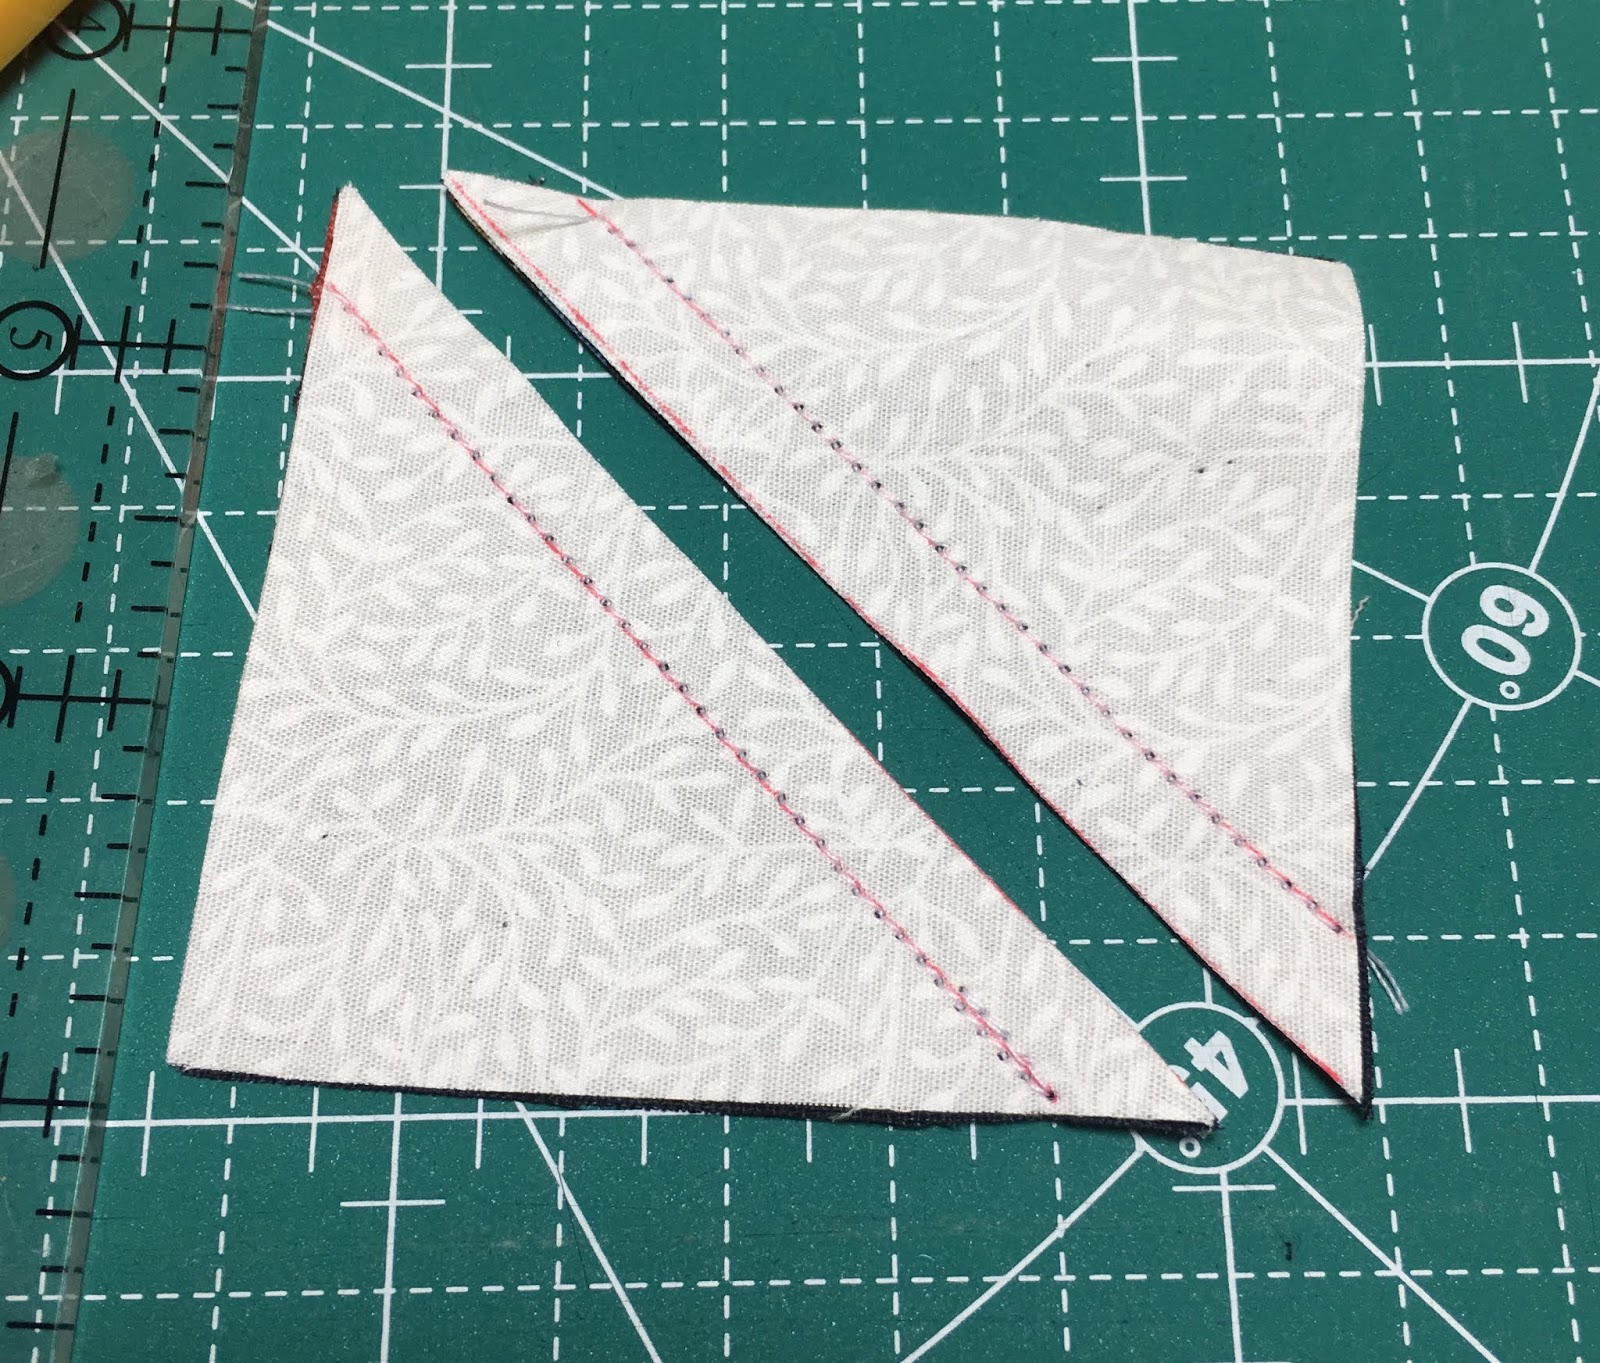
Layer one background and one star 3 1/2 inch square right side facing and pin. Draw a diagonal line from corner to corner. Then draw a line quarter inch either side of diagonal line.
Sew on the outer lines. I like to use an open toe foot on my sewing machine for sewing when using this method. I like to be able to see the line where I am sewing. If you wish you could hand stitch the lines.
The cut on the centre line. Repeat with the other pair 3 1/2 squares.
Press towards the darkest fabric. PRESS, please do not iron, and treat with care as this is a bias seam. Now trim the half square triangle squares to 2 1/2 inches. Remembering to place the 45 degree line on your ruler along the stitched seam.
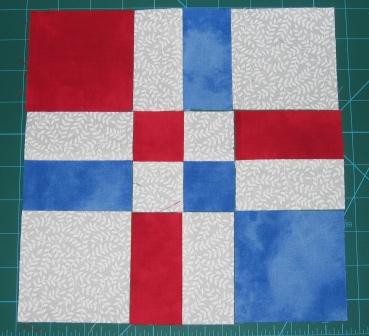
Arrange your squares as shown above. Watch out for the correct placement of your half square triangle squares.
Sew into three rows using a quarter inch seam allowance. Press the top and bottom seams away for the centre square. Press the middle seams towards the centre square. This will make it easy to stitch the three rows together. Please remember to match up all your seams.
Now give your finished block a press. The block should now measure 6 1/2 inches. Once sewn into a project or quilt it will a 'finished' 6 inch square.